Search This Blog

Showing posts with label Ubuntu Apps. Show all posts

Friday, July 10, 2009

Getting a KPIG Radio Stream to work in Firefox on Ubuntu

Any software engineer worth his or her salt needs to occasionally give KPIG radio a listen.

Trouble is that clicking on Listen to Stream from http://www.kpig.com produces a pop-up player that can't find the proper plug-in. The issue seems to be that a mmsh (microsoft media server) protocol service is missing.

This is easily resolved by opening a terminal window and getting the vlc firefox plug-in that enables the player.

From the Main Menu panel -> Applications -> Accessories -> Terminal


sudo apt-get install vlc mozilla-plugin-vlc


You may not even need to restart Firefox. The plug-in will work although you may get a confusing player message: Waiting for video.

This is just a harmless message. The audio plays brilliantly.

Saturday, July 4, 2009

Ubuntu Apps: Firefox on Steroids

Firefox as it is installed out of the box with Jaunty Jakalope is an anemic instantiation of what we have come to expect from it.

We're going to fix that right now for 64-bit machines. We're going to install the 64-bit version of Adobe's Flash plug-in. This will resolve a number of festering issues that used to plague Firefox on Ubuntu.

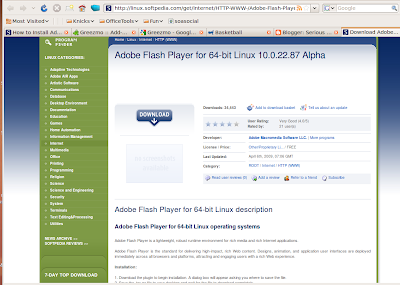
Step 1.) Download the Alpha 64-bit version of the Adobe Flash Player from Softpedia. Ignore the instructions found there. We'll give a hat tip to Marius Nestor, the Linux editor at Softpedia for guidance but the instructions there are slightly dated.

First you'll click Download here:


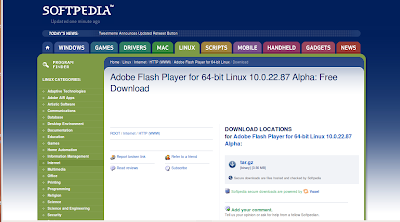
That will take you to a redundant page giving you the ability to finally download the tar file (more or less a zip file). Click Download here as well.


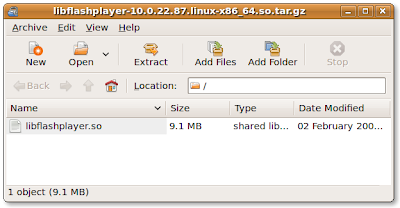
When you're asked what to do with the file, open it with Archive Manager.


Step 2.) Let's extract this file to the .mozilla directory under our home directory like so:


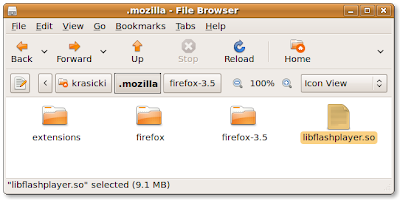
Your directory probably won't (and shouldn't) have the Firefox 3.5 directory in it. You may, however, have a plugins directory.

Close the Archive Manager.

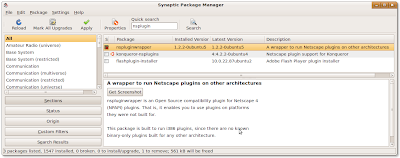
Step 3.) We have to get rid of the existing Adobe Flash solution. From the Ubuntu Main Menu panel click System -> Administration -> Synaptic Package Manager. You'll need to supply your root password.

In the Quick Search locate 'nsplugin'. This will find nspluginwrapper, the plugin solution we're replacing.

Click the checkbox next to nspluginwrapper and mark it for complete removal. Click the Apply button and its gone.


Step 4.) Install the new stuff. From the Ubuntiu Main Menu panel, click Places -> Home Folder. In the Home Folder click the View Menu item and click Show Hidden Files.

Open the .mozilla folder. If there is no plugins directory, create it (all lower case letters).

Then drag and drop libflashplayer.so there from the .mozilla directory.

Restart Firefox. Take the browser for a test drive of video intensive sites.


Assuming you're successful and happy with that upgrade, how about adding a video player to Firefox, say something that plays YouTube videos from a playlist seamlessly in Firefox while you use Firefox for browsing as well?

Step 1.) Go to the Greezmo website.


You'll need to agree to install the experimental version of this application before it let's you download it.


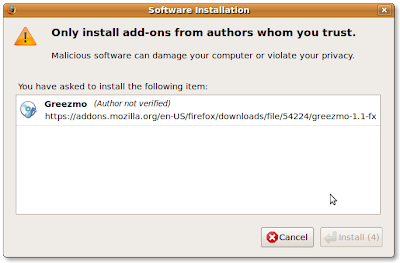
If you agree, then download it.

Step 2.) Greezmo requires one last approval because it is currently unsigned. Once you give it Restart Firefox.


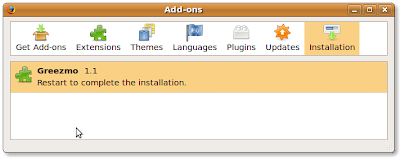
Step 3.) Greezmo installs in the lower right-hand corner of Firefox.


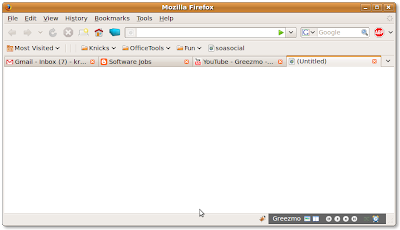
By moving your mouse over the Greezmo icons, you can find and open the 'Manager Panel' that creates a frame along the lower part of Firefox like so:


The left panel of Greezmo allows you to specify an artist to find and delivers all their videos there. Dragging and dropping into the right panel adds the video to the playlist.

You can open a video pop-up to entertain you while you work or study. The playlists are controlled by a timer and the Greezmo frames can be later minimized in Firefox.

An elegant and beatifully executed Firefox add-on!

Ubuntu Apps: Installing Gwibber

Gwibber is a micro-blogging client that allows you to connect to any number of sovcial microblogging applications. In my case, I use Twitter but many more are supported.

Step 1.) Get Gwibber here. In my case I clicked on the Jaunty Jackalope link which is just as smooth as can be. You'll have to navigate your own Ubuntu package.

For Jaunty, you'll see:


From here, click the Install button and Gwibber is added to the Applications -> Internet menu.

Step 2.) Run Gwibber from the Main Menu -> Applications -> Internet -> Gwibber Microblogging Client. The application looks like:


Step 3.) Let's set up a micro-blogging client. In my case, I have an existing Twitter account in my name.

Click on the Accounts -> Manage menu item. You will see this Manage Accounts screen:


Click the Add button and select the micro-blogging application you have an account on.

Next, fill in the appropriate information:


Unfortunately, as of this writing, a system glitch may prevent you from entering a password. If this is not a problem, click OK when you've completed the form and you'll see a newly created micro-blogging service such as seen in this picture:


Click the Close button.

If you cannot enter the password, perform the following instructions for the Jaunty jackalope version of Ubuntu.

The Locked Keyring Solution

I spent an enormous amount of time trying (and failing) with a number of previously published internet remedies for this problem. THIS SOLUTION IS WHAT WORKED.


Problem and symptoms: When entering a password for any number of internet dependent Ubuntu applications a window asking the user to "Enter password for default keyring to unlock" will appear. Nothing the user enters satisfies this request.

Solution: On the Main Menu panel, click Applications -> Accessories -> Passwords and Encryption Keys.

Click the Passwords tab and highlight the Passwords: login password found there. Right-click on it and click Delete.


Exit the Passwords and Encryption Keys application. The elimination of this key will seamlessly allow you to enter the appropriate password in Gwibber.

As an aside, I was very nervous about deleting this key but I had tried and failed a dozen other ways. The key is recreated by the system later on apparently not interfering with Gwibber or anything else.

Step 4.) Let's test the connection. In Gwibber, send a message to your micro-blog. I sent "Testing Gwibber" to Twitter and after clicking Gwibber -> Refresh from the Gwibber main menu, my Messages tab displayed the content:


After a system restart, Gwibber continues to work properly:


Friday, July 3, 2009

Ubuntu Apps: Installing DropBox

DropBox is an application that provides various levels of storage in the 'cloud' so-to-speak. In other words, if you choose to add this application, you can store files away from your computer on a storage device that will allow you and, optionally others, to access that storage space and its contents regardless of operating system!

Step 1.) Sign up here.

Step 2.) Assuming you decide to try it, click the Download Button. Next, you'll be asked whether or not you're a new user:
Click the New to Dropbox radio button.

Step 3.) Choose the download that's appropriate for your version of Ubuntu by clicking and saving the file to your desktop:


Step 4.) Double-click the downloaded DropBox installation file. It will begin the installation of the DropBox client.


Click the Install button.

Step 5.) Next you'll be asked to choose a service option. For our example, we're choosing the free storage option. Make your choice and click the Forward button.


Step 6.) The installation will continue with a 'tour of features. You can forward through this or skip the tour and finish. Once you are finished the DropBox application is installed.


Step 7.) Let's fire it up! On the Main Menu panel, click the Applications menu, then click the Internet sub menu item. DropBox will appear as an application there.

Click on it. You'll be asked where to put your locally accessible Dropbox folder and in our example we simply defaulted to the suggested destination. Once established this application simply activates an internet connection for the DropBox and an icon appears on the Main Menu panel tha allows you to modify the DropBox settings (out of the scope of this discussion).

Nota Bene: You'll also be asked to agree to terms of service and to map your account to an email address. None of this is covered here because it is vendor discretionary stuff and thus more volatile than these basics.

Once formalized, the directory appears as such:


On computers that will share this directory the same procedure of downloading a DropBox client must be followed. This will allow you and your cohorts to use a common repository for notes and documents useful in collaboration environments.

Files can be accessed by logging in to DropBox here.

In future posts we'll explore this more.